Soft Pastel Ombre Nails: Easy At-Home Gel Manicure Guide for Beginners
This article contains affiliate links. As an Amazon Associate, I earn from qualifying purchases. This comes at no extra cost to you.
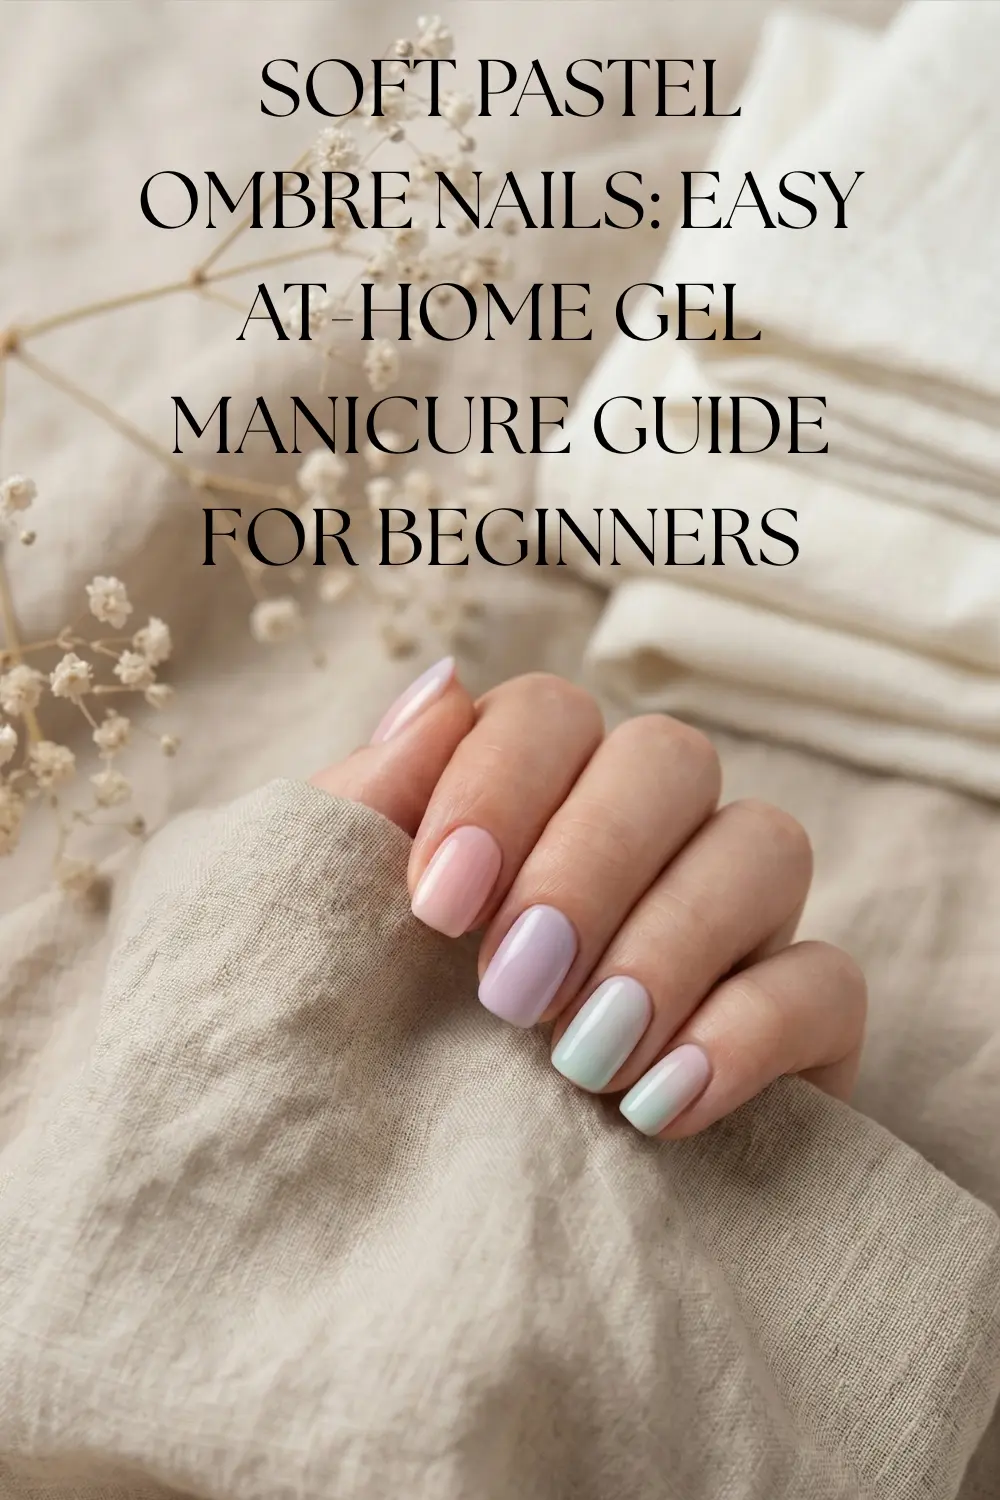
Image is for style inspiration. Actual products may vary.
Soft pastel ombre nails are one of the most versatile and elegant manicure styles you can create at home. The gentle fade from one light shade to another delivers a polished look without feeling overpowering. Whether you’re dressing for work, brunch, or a special event, this soft gradient design complements nearly any outfit while still allowing room for creativity.
Pastel gradients, in particular, offer a gentle balance between minimalism and personality. The gradual fade between light shades creates a clean, airy finish that complements everything from structured workwear to relaxed weekend outfits. Whether you prefer delicate pinks and lilacs or soft blues and creamy neutrals, the look can be customized to reflect your personal style.
Beyond aesthetics, taking the time to create your own manicure can become a calming ritual. Filing, layering, and blending colors requires focus and patience, turning an ordinary beauty task into a mindful self-care moment. Instead of rushing through your routine, you’re intentionally slowing down and creating something with your hands.
In this guide, you’ll discover how to achieve a smooth pastel gradient effect at home, along with practical tips to help your manicure look refined and last longer.
Why Pastel Ombre Manicures Remain Popular
Soft pastel ombre nails remain popular because they strike a balance between subtlety and style. The gradual fade from one soft shade to another creates dimension without looking busy or overwhelming. Unlike bold graphics or heavy embellishments, a blended pastel design feels polished yet understated making it suitable for both professional settings and relaxed weekends.
Another reason for their staying power is versatility. Pastel tones naturally align with seasonal shifts, especially in spring and summer, but the ombre transition keeps the look from feeling overly themed. A soft gradient can complement structured office attire, romantic event outfits, or casual denim just as easily. The design adapts to different nail shapes and lengths, whether you prefer short, natural nails or longer, sculpted styles.
Customization also plays a major role in their popularity. You can experiment with classic pairings like pink and white, try complementary blends such as lavender and mint, or create monochromatic fades within the same color family. The technique allows creativity without requiring intricate nail art skills.
Beyond appearance, pastel gradients appeal to those who value mindful beauty routines. The blending process encourages patience and precision, transforming a simple manicure into a small act of self-care. In a fast-paced world, taking time to layer and refine soft hues can feel grounding.
Ultimately, pastel ombre manicures remain popular because they offer elegance, adaptability, and a creative outlet all within a design that feels timeless rather than trend-dependent.
If you’re exploring more seasonal inspiration, you’ll also love our full guide to Spring Nail Trends 2026: Designs, Colors & Styles to Try This Season, where we break down the biggest manicure looks of the year.
Essential Tools for Creating a Pastel Gradient
Creating a smooth pastel gradient manicure at home becomes much easier when you have the right tools. Each item plays a specific role in helping you achieve a soft, seamless fade with clean edges and lasting results. Below are the core essentials to build a reliable setup.
Gel Nail Polish Set
A quality gel nail polish set in soft pastel shades is the foundation of any gradient design. Look for complementary tones such as pinks, lilacs, mints, or baby blues that blend naturally together. Gel formulas often allow you to layer gradually and cure between steps, which can make it easier to control opacity and achieve smooth transitions compared with some regular polishes.
Sponges with Grabbing Pen
Small cosmetic sponges are commonly used to create the diffused fade effect. When paired with a grabbing pen or holder, they allow for more precise tapping without getting polish directly on your fingers. The sponge helps blend two shades together by lightly pressing them onto the nail surface in thin layers.
Gradient Brush
A flat or slightly tapered gradient brush is helpful for refining the blend where two colors meet. Instead of dabbing, this tool allows you to gently tap or sweep across the center line to soften any harsh edges. It’s especially useful for detailed blending near the cuticle and sidewalls.
Gel Base Coat
A gel base coat supports adhesion and prepares the nail for color application. Applying a thin, even layer and curing it properly creates a smooth surface for the gradient layers that follow.
Milky White Gel
A semi-sheer milky white gel can act as a soft foundation under pastel shades. It subtly brightens lighter tones and helps the transition appear more diffused and dimensional.
UV LED Nail Lamp
A UV or LED lamp is used to cure gel polish according to the manufacturer’s instructions. Proper curing ensures each thin layer hardens fully before the next is applied, supporting overall durability and finish.
The Born Pretty Macaron Gel Polish Set

The Born Pretty Macaron Collection features a coordinated 6-piece set of 7ml pastel gel polishes designed for smooth blending and seasonal gradient designs. This high-gloss formula is specifically curated to work as a cohesive color family, offering buildable opacity that performs best when applied in thin, even layers. When used with a compatible base and top coat and cured under a UV/LED lamp, these soft macaron tones provide a durable, professional-grade finish for minimalist or colorful nail art.
If you’re building a pastel gradient kit, a coordinated color set makes blending much easier. This 6-piece macaron collection includes soft spring-summer tones such as pink, yellow, purple, blue, and green in 7ml bottles. The shades are designed to work well on their own or layered together for a smooth fade effect.
The brand describes the formula as long-wearing when used with a base and top coat and cured as directed; individual results vary by prep and wear habits. As with most gel systems, results depend on prep, thin layering, and correct curing. The finish is glossy once sealed with a compatible top coat.
Why it works well for pastel gradients:
- Coordinated color family for easy blending
- Compact 7ml bottles suitable for seasonal rotation
- Glossy gel finish when applied and cured correctly
Application notes:
- Apply in thin coats to reduce uneven curing
- Use a compatible base and top coat
- Cure according to manufacturer instructions
- Avoid skin contact with uncured gel
Safety reminder (per brand guidance):
Follow the product’s safety guidance: use only on nails, avoid eye/mouth contact, stop use if irritation occurs, and keep products away from children.
This type of set is especially useful for beginners experimenting with soft gradient techniques because it removes the guesswork of pairing complementary pastel tones.
The Fcozpjk Soft Sponge and Grabbing Pen Set

The Fcozpjk Nail Art Set provides a professional blending solution for creating seamless pastel gradients and diffused “aura” nail designs. This 100-piece kit includes a precision grabbing pen with a stretchable claw mechanism, designed to hold the mini square sponges securely for better control and cleaner application. By allowing for targeted dabbing and layered building of color, these compact tools help soften harsh lines and achieve a smooth, professional-grade fade with both gel and regular polishes.
Blending is the key step in creating a smooth pastel gradient, and small cosmetic sponges are commonly used to achieve that diffused fade effect. This set includes 100 mini square sponges along with a metal grabbing pen designed to hold each sponge in place during application.
Each mini sponge is small and designed for controlled placement on nail surfaces; check the product listing for exact dimensions. The compact size allows you to tap color precisely where two shades meet, helping soften harsh lines during ombre or aura-style designs.
The included grabbing pen features a stretchable claw mechanism that holds the sponge securely. Using a holder instead of your fingers can help keep polish off your skin and provide more stability while dabbing gel or regular polish onto the nail.
Why it’s useful for gradient designs:
- Mini size supports detailed blending
- Replaceable sponges for hygienic use
- Pen holder offers better control during application
How to use:
- Apply two gel shades side-by-side onto the sponge
- Lightly tap onto the nail surface
- Build color gradually in thin layers
- Cure between layers if using gel polish
This type of tool can be helpful for both beginners and experienced DIY users experimenting with soft fades and layered nail art techniques.
BQAN Nail Ombre Gradient Brush

The QAN Ombre Brush features split-level nylon bristles specifically engineered to create seamless color transitions in gel nail art. This dedicated blending tool offers superior precision compared to sponges, allowing users to gradually diffuse color along the meeting point of two shades for a professional-grade fade. Designed with a decorative rhinestone acrylic handle for enhanced grip, it provides the controlled sweeping or tapping necessary for smooth gradients near the cuticle and sidewalls.
For those who prefer more control than a sponge provides, a dedicated gradient brush can help refine the transition between two gel shades. This ombre brush is designed specifically for blending gel polish to create a softened fade effect across the nail surface.
The brush features nylon bristles arranged in split levels, which allows color to diffuse gradually rather than creating a sharp line. When lightly tapped or gently swept across the meeting point of two shades, the bristles help merge them into a smoother gradient. This can be especially useful near the cuticle area or along the sidewalls, where precision matters most.
The handle is made from acrylic and includes decorative rhinestones for added grip and visual appeal. After use, the bristles can be cleaned with alcohol or acetone according to standard gel brush care practices.
Why it’s helpful for gradient techniques:
- Designed specifically for gel ombre blending
- Split-level bristles support gradual color diffusion
- Offers more controlled blending compared to sponges
How to use:
- Apply two gel shades side-by-side on the nail
- Lightly tap or sweep across the center where they overlap
- Work in thin layers and cure between applications
This type of brush can be suitable for both salon professionals and DIY users who want more precision when creating soft gradient nail designs.
The GELLEN Gel Base and No-Wipe Top Coat Set

- Superior Gel Top & Base Coat: You will get 1*18ml Strong Gel Base Coat and 1*18ml Glossy Gel Top Coat. Gellen Strong Bas…
- Long Lasting for 28+ Days: With advanced formula, our Strong Base Coat prevents from peeling off and Glossy Top Coat pro…
- Multiple Compatibility: It is suitable for natural nails, nail lamp gel nails, artificial nails, nail tips etc and a per…
A reliable base and top coat combination plays an important role in how your gel manicure looks and wears over time. This two-piece set includes one 18ml gel base coat and one 18ml glossy no-wipe top coat, designed for use with UV or LED curing lamps.
A base coat is intended to improve adhesion between the natural nail and gel layers; correct prep and technique influence final results. The no-wipe top coat is intended to seal the design with a glossy finish, eliminating the need to cleanse a sticky residue after curing.
According to the brand, longevity depends on proper prep, thin layering, and correct curing under a compatible lamp. As with all gel systems, results may vary based on nail condition, technique, and daily wear habits.
Why it’s useful for gradient manicures:
- Provides a foundation layer before color application
- Glossy top coat helps seal blended designs
- No-wipe formula simplifies the final step
Application notes:
- Apply thin, even coats
- Cure according to manufacturer instructions
- Perform a skin test before use
- Avoid contact with skin and discontinue if irritation occurs
A consistent base and top coat routine can help support smoother color application and improve overall finish when creating pastel gradient nail designs.
The GAOY Milky White Gel Nail Polish (Shade 1482)

The GAOY Milky White Gel Polish provides a sheer, buildable foundation specifically designed for soft pastel gradients and minimalist nail art. Its translucent formula allows for a customizable finish, ranging from a light wash to a more opaque milky tone, helping to diffuse transitions and prevent lighter shades from appearing patchy. When cured under a UV/LED lamp, this 16ml professional-sized bottle offers a neutral, clean base that enhances the softness of ombre effects while ensuring a smooth, high-gloss surface.
A milky white base can make a noticeable difference when creating soft pastel gradients. This 16ml gel polish in shade 1482 offers a sheer, buildable formula that can be layered from a translucent wash to a more opaque finish, depending on your preference.
Using a semi-sheer white underneath pastel tones can help soften the overall look and make color transitions appear more diffused. It also provides a neutral foundation that prevents lighter shades from looking patchy.
According to the brand, this gel polish requires curing under a UV or LED lamp. Cure times may vary depending on the lamp and application thickness, so always follow manufacturer instructions. Thin layers are recommended for more even curing and smoother results.
Why it’s helpful for gradient manicures:
- Sheer, buildable coverage
- Helps soften pastel blends
- Larger 16ml bottle for repeated use
Application notes:
- Lightly buff nails before applying base coat
- Apply thin layers for controlled opacity
- Cure fully between coats
- Avoid skin contact with uncured gel
As with most gel systems, wear time depends on preparation, curing accuracy, and daily habits. A milky white shade like this is commonly used as a subtle base to enhance pastel ombre effects while keeping the overall finish clean and refined.
The SUNUV SUNone UV LED Nail Lamp

The SUNUV SUNone is a professional-grade curing lamp designed for both home and salon-style gel nail art. Featuring 30 powerful LED beads and multiple timer settings (5s, 30s, and 60s), it provides the even light distribution necessary for properly hardening various gel polish brands. Its integrated infrared auto-sensor and removable base offer a hands-free, versatile experience for both manicures and pedicures, ensuring a durable and high-gloss finish.
A curing lamp is required to properly harden most gel polishes; follow the gel manufacturer’s guidance for compatible curing methods. The SUNone UV LED Nail Lamp is designed for both home and salon-style use and is compatible with many gel polish brands when used according to product instructions.
This model features multiple preset timer options (5s, 30s, 60s, and 99s) and an automatic sensor that activates the light when you place your hand inside. These settings can help streamline the curing process and provide consistency across layers. The removable base also allows for easier use during pedicures.
The lamp contains multiple LED beads intended to distribute light evenly across the nail surface. Exact curing times vary depending on the gel brand, color opacity, and layer thickness, so it’s important to follow the gel manufacturer’s guidance rather than relying on a single preset.
Why it supports gradient manicures:
- Compatible with many gel polish systems
- Multiple timer settings for flexibility
- Automatic sensor for hands-free use
Application notes:
- Apply thin gel layers for more even curing
- Cure according to gel product instructions
- Avoid looking directly at the light during operation
A dependable curing lamp helps ensure each layer sets properly, which supports smoother blending and overall durability in pastel gradient nail designs.
The Modelones 4-Piece Nail Prep & Foundation Set
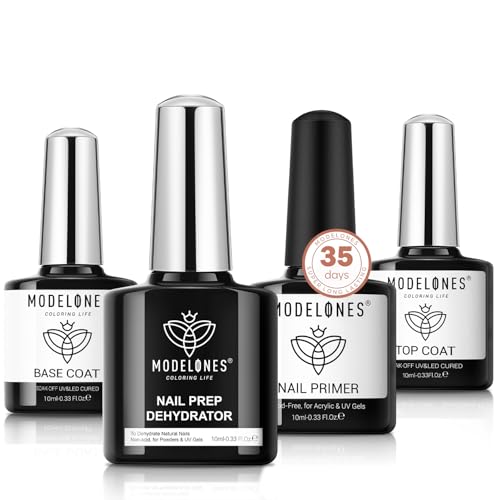
The Modelones Nail Prep Set provides a complete four-step foundation designed to enhance the adhesion and longevity of gel manicures. This professional kit includes a nail dehydrator to remove surface oils, an acid-free primer for superior bonding, and a coordinating gel base and top coat. By creating a clean, smooth surface before color application, this system helps prevent lifting and provides the stable base necessary for seamless pastel gradients and detailed nail art.
Proper prep is one of the most important steps in any gel manicure routine. This four-piece set includes a nail dehydrator, acid-free primer, gel base coat, and glossy gel top coat designed to create a complete foundation before applying color.
The dehydrator is intended to remove surface oils from the nail plate, while the primer helps support adhesion between the natural nail and gel layers when applied correctly. The included base coat prepares the surface for color application, and the top coat seals the design with a glossy finish after curing.
According to the brand, this system is formulated to be acid-free and compatible with various gel and acrylic nail products. As with all nail systems, wear time and durability depend on preparation, thin application, proper curing, and daily nail care habits.
Why it’s useful for pastel gradient manicures:
- Multi-step prep in one set
- Acid-free primer option
- Designed to support adhesion before layering color
Application notes:
- Perform a skin test before full application
- Apply thin layers to reduce uneven curing
- Cure gel layers according to manufacturer instructions
- Discontinue use if irritation occurs
Using a structured prep routine can help create a smoother base for blending pastel shades and may improve overall consistency in at-home gel manicure results.
It’s also one of the standout looks featured in our roundup of this season’s must-try styles in Spring Nail Trends 2026.
How to Create a Pastel Ombre Manicure at Home
Creating a pastel ombre manicure at home may look intricate, but when broken down into clear steps, the process becomes manageable and even relaxing. The key is working in thin layers, blending gradually, and curing properly between each stage.
Step 1: Prepare Your Nails Properly
Long-lasting results begin with thorough preparation. Start by removing any existing polish and washing your hands. Gently push back your cuticles and trim only excess skin if needed. Shape your nails using a fine-grit file — oval and almond shapes tend to complement gradient designs beautifully, but any shape works.
Lightly buff the surface of each nail to remove shine. This helps gel products adhere more evenly. After buffing, wipe the nails with alcohol or a nail cleanser to remove dust and oils. Apply a dehydrator and primer according to product instructions, avoiding skin contact.
Proper prep creates a clean foundation, which helps reduce lifting and improves overall finish.
Step 2: Apply the Base Layer
Apply a thin layer of gel base coat and cure under your UV or LED lamp according to the manufacturer’s instructions. Keep the coat thin and even to prevent wrinkling.
For a softer gradient effect, apply one thin layer of milky white gel polish and cure fully. This optional step helps pastel shades appear more diffused and blended. If you prefer slightly more opacity, apply a second thin coat and cure again.
Avoid thick layers gradual build-up produces smoother results.
Step 3: Choose Your Blending Method
There are two common techniques for creating a pastel gradient: the sponge method and the brush blending method. Both can produce beautiful results depending on your comfort level.
Sponge Method (Beginner-Friendly)
- Apply two pastel shades side-by-side onto a small cosmetic sponge, allowing them to slightly overlap in the center.
- Lightly dab the sponge onto the nail using gentle tapping motions.
- Cure the thin layer as directed.
- Repeat the dabbing and curing process in thin layers until the fade appears smooth.
If the surface looks slightly textured after sponging, don’t worry. The top coat will help smooth minor unevenness.
This method creates a soft, diffused look and works especially well for beginners experimenting with ombre designs.
Brush Blending Method (More Controlled)
- Paint one pastel shade on one half of the nail and a second shade on the other half, overlapping slightly in the center.
- Using a clean gradient brush, gently tap or sweep horizontally across the meeting point. Use light pressure avoid dragging too firmly.
- Cure the layer fully.
- Repeat thin applications if needed to refine the transition.
This technique offers more precision, especially near the cuticle and sidewalls.
Step 4: Seal and Finish
Once you’re satisfied with the gradient, apply a thin layer of gel top coat. Make sure to cap the free edge of the nail to support durability. Cure thoroughly according to instructions.
After curing, your manicure should have a glossy, sealed finish.
Tips for a Smoother Fade
- Work in thin layers rather than trying to achieve full opacity in one coat.
- Blend gradually; overworking the polish can create streaks.
- Cure each layer fully before adding the next.
- Clean around the cuticle area before curing if excess polish touches the skin.
- Be patient gradients often look best after two to three controlled layers.
With practice, the process becomes intuitive. A pastel ombre manicure is less about perfection and more about soft transitions and controlled blending. Taking your time with each step will help you achieve a refined, elegant result from the comfort of home.
Improving Wear Time
Improving the wear time of your gel manicure starts long before the top coat goes on. Proper nail preparation is important. Lightly buffing the nail surface, removing dust and oils, and applying a dehydrator and primer as directed can help create a cleaner foundation for adhesion. Skipping prep is one of the most common reasons gel polish lifts prematurely.
Thin, even layers also make a noticeable difference. Applying gel too thickly can lead to uneven curing, which may cause peeling or wrinkling. Cure each layer fully according to the product’s instructions before adding the next. Taking your time during this step helps ensure the polish sets properly.
Sealing the free edge of the nail with both color and top coat can support durability. After your manicure is complete, small habits matter. Wear gloves while cleaning, avoid using your nails as tools, and apply cuticle oil regularly to keep the surrounding skin hydrated. With consistent prep, controlled application, and mindful aftercare, gel manicures can maintain their shine and structure for an extended period.
Choosing Gel Nail Tools
Selecting the right tools can make at-home gel manicures more consistent and easier to manage. Start with a curing lamp that is compatible with the gel brands you plan to use. Always check manufacturer instructions for recommended curing times rather than assuming all gels cure the same way.
When choosing a primer, many users prefer acid-free options for general use, especially if they have sensitive skin. Reviewing ingredient lists can help you make informed decisions based on your personal needs. A quality base coat and top coat are also important, as they support adhesion and help seal the final design.
For blending techniques, small cosmetic sponges are ideal for diffused gradients, while a dedicated ombre brush provides more controlled transitions. Investing in simple but dependable basics such as a fine-grit buffer, lint-free wipes, and a cleanup brush can improve precision.
Rather than buying everything at once, consider building your kit gradually. Start with core essentials, practice your technique, and expand your tools as your comfort and skill level grow.
Frequently Asked Questions
How long does a pastel ombre gel manicure typically last?
With proper nail preparation, thin layering, and correct curing, gel manicures often last around two to three weeks. Longevity depends on nail condition, application technique, and daily activities.
Can beginners successfully create an ombre effect at home?
Yes. The sponge method is especially beginner-friendly because it allows you to build color gradually. It may take a few attempts to perfect the blend, but working in thin layers helps improve results.
Do I need a UV or LED lamp for gel polish?
Yes. Gel polish requires curing under a compatible UV or LED lamp to harden properly. Always follow the gel manufacturer’s instructions for curing times and compatibility.
Can I achieve a pastel gradient using regular nail polish?
Yes, an ombre effect can be created with traditional polish using a sponge. However, regular polish dries more quickly, so blending must be done faster, and wear time may be shorter than gel.
What’s the safest way to remove gel polish?
Lightly file the top coat to break the seal, soak cotton in acetone, place it on the nail, and wrap with foil for about 10–15 minutes. Gently push off the softened product and avoid forceful peeling to protect your natural nails.
Conclusion
A pastel ombre manicure is a beautiful way to experiment with soft color while keeping your look refined and versatile. The gentle fade between shades adds dimension without feeling overwhelming, making it suitable for everyday wear as well as special occasions. With a bit of patience and thin, controlled layers, this technique becomes easier each time you practice.
If you’ve been thinking about trying a gradient design at home, this is a great place to start. Choose a pair of complementary pastel shades, take your time with blending, and enjoy the creative process as much as the final result.
If you give this look a try, feel free to share your experience or any questions in the comments I’d love to hear how it turned out for you. Product links above are provided for convenience and reference; review product details and manufacturer guidance to choose what fits your needs.